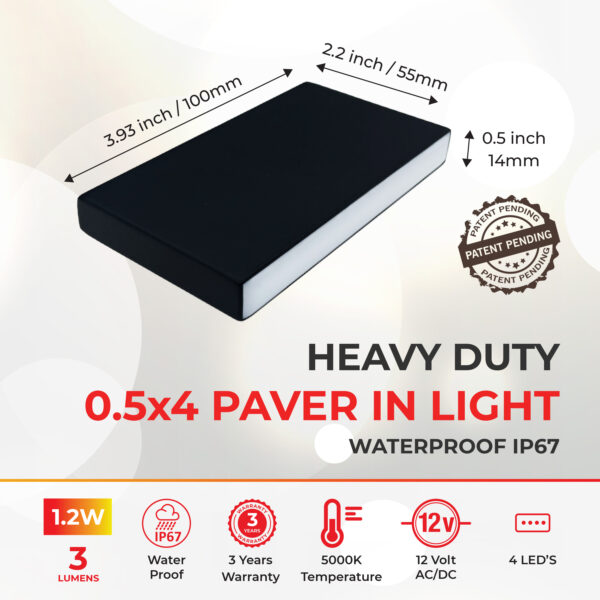
“Paver Light 0.5×6 Inch 5000K Brick Lighting For Pavers, Driveway, Pathway Patio, & Garden, 12V Waterproof IP67, Drive-Over Rated” has been added to your cart. View cart
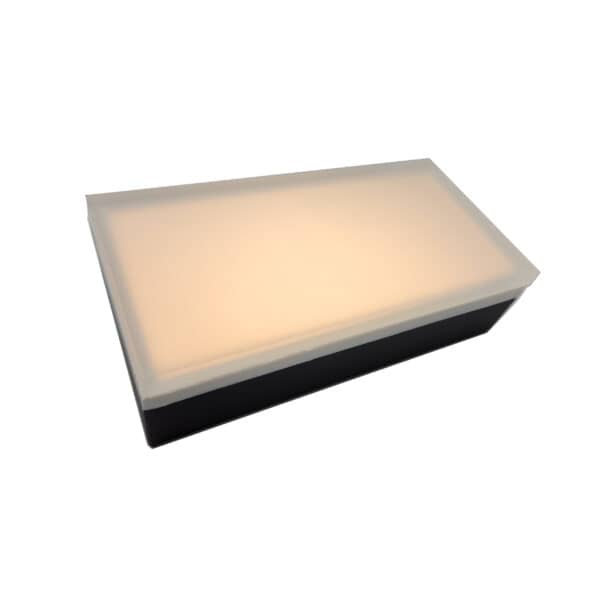
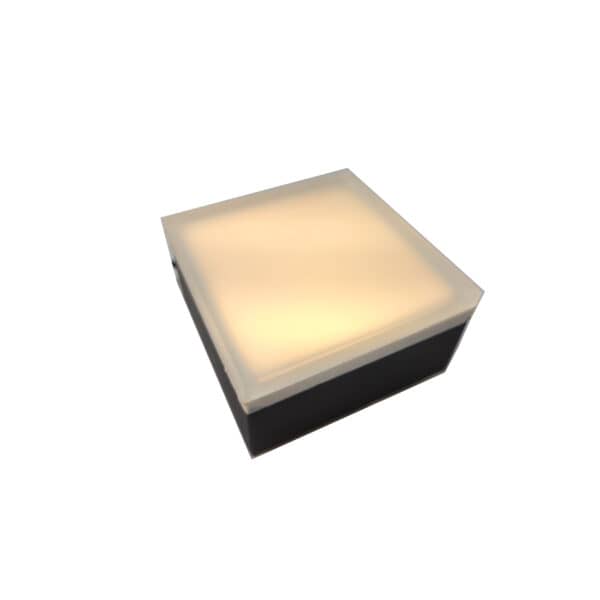
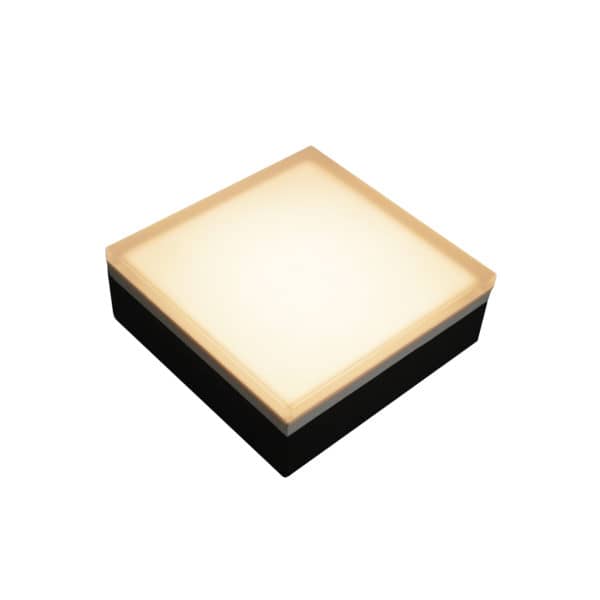
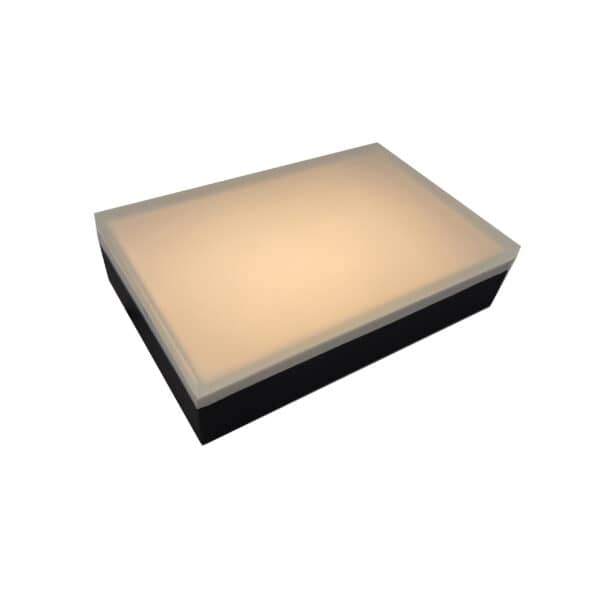
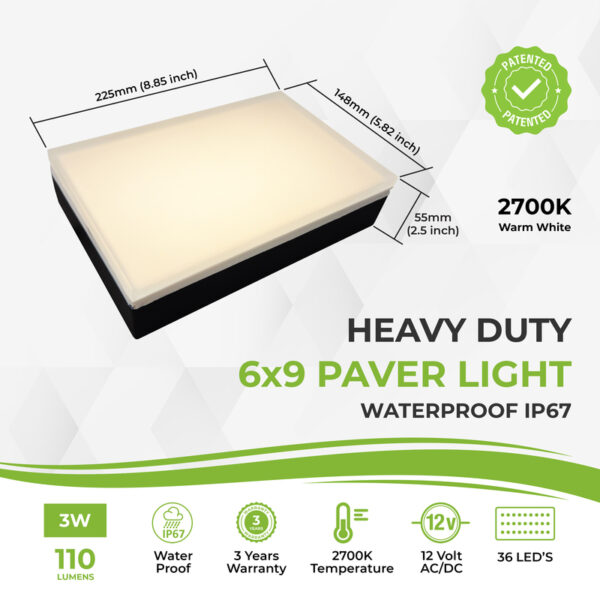
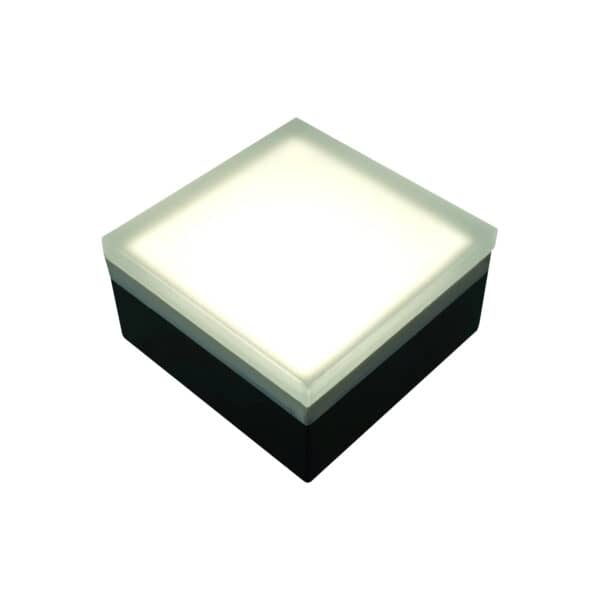
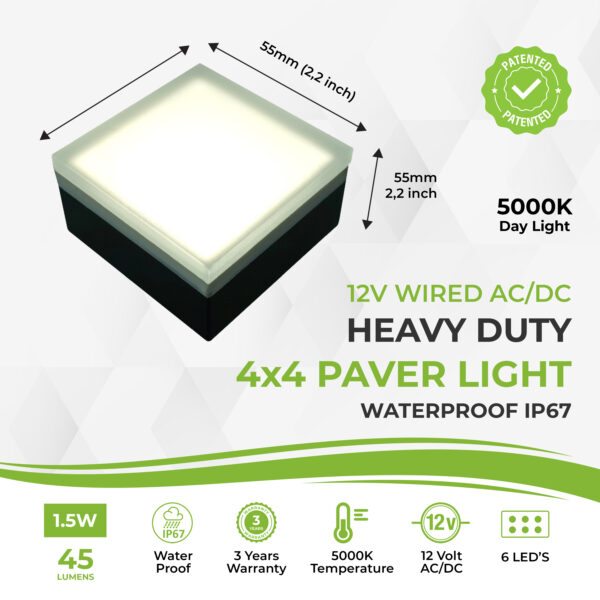
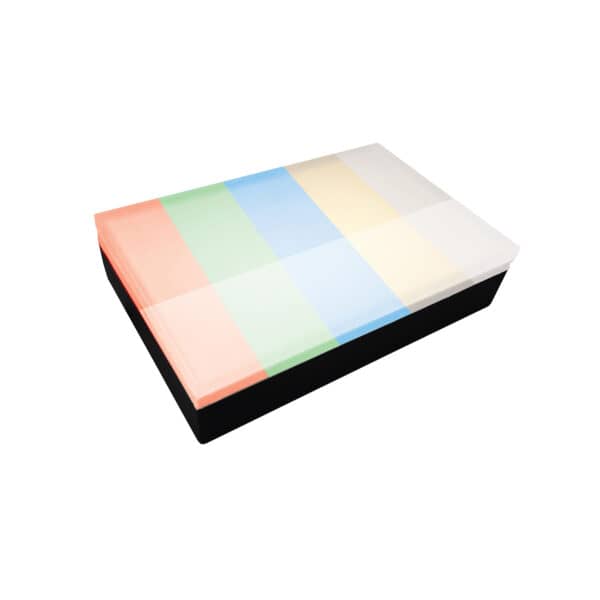
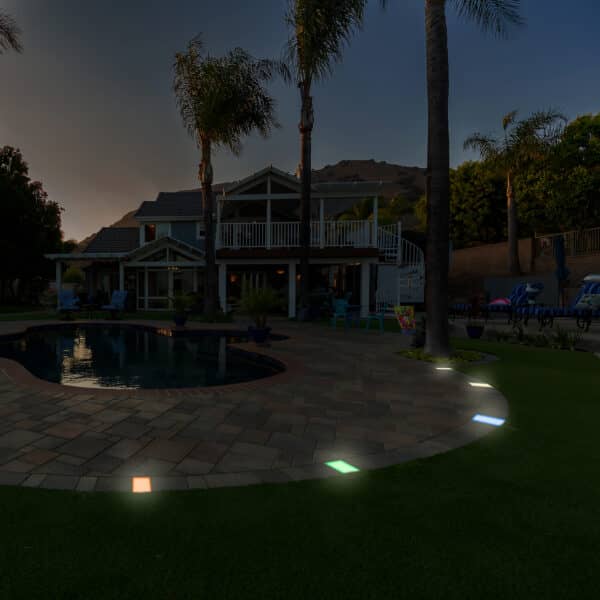
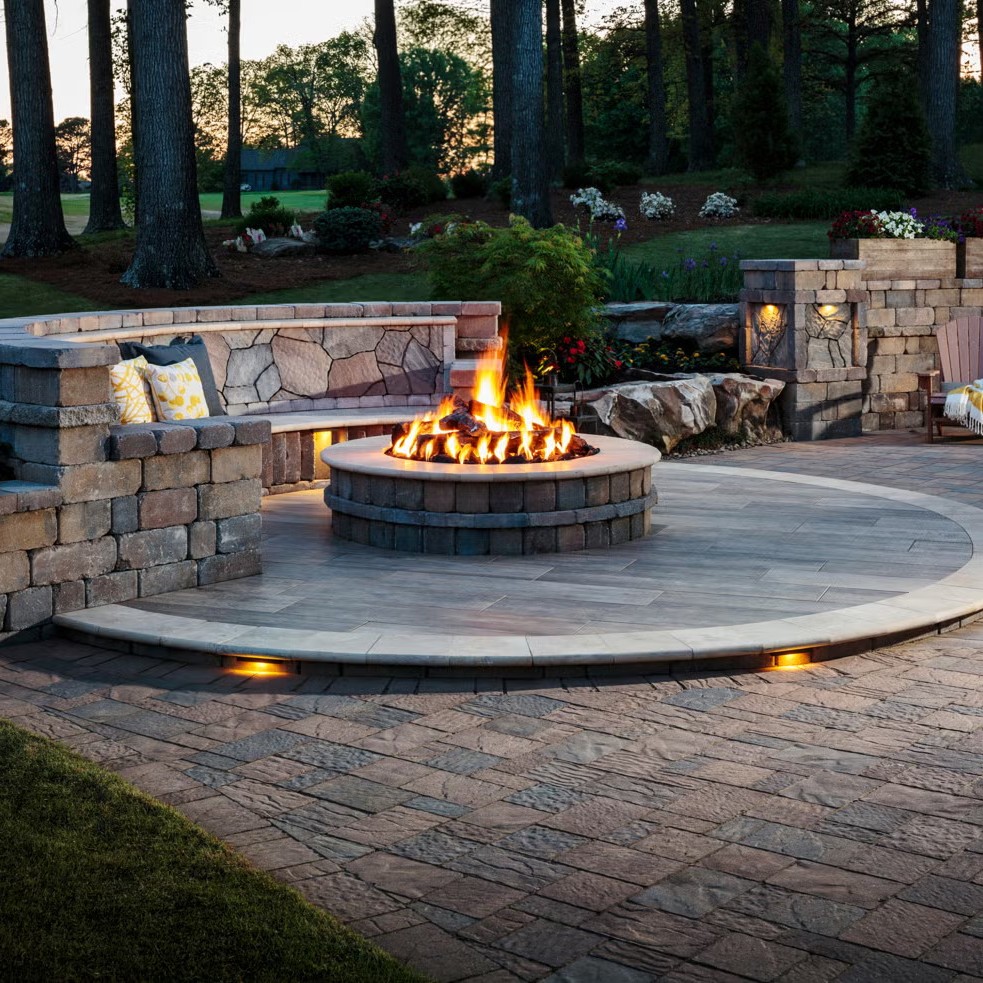
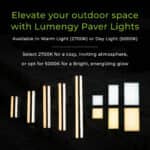
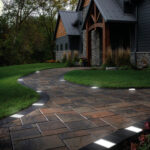
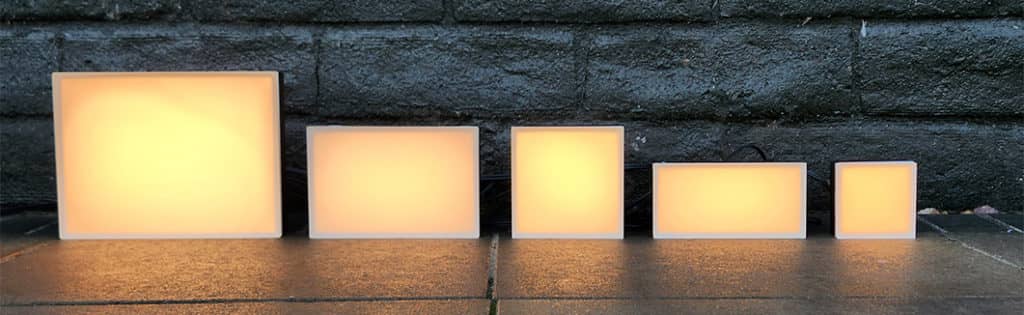
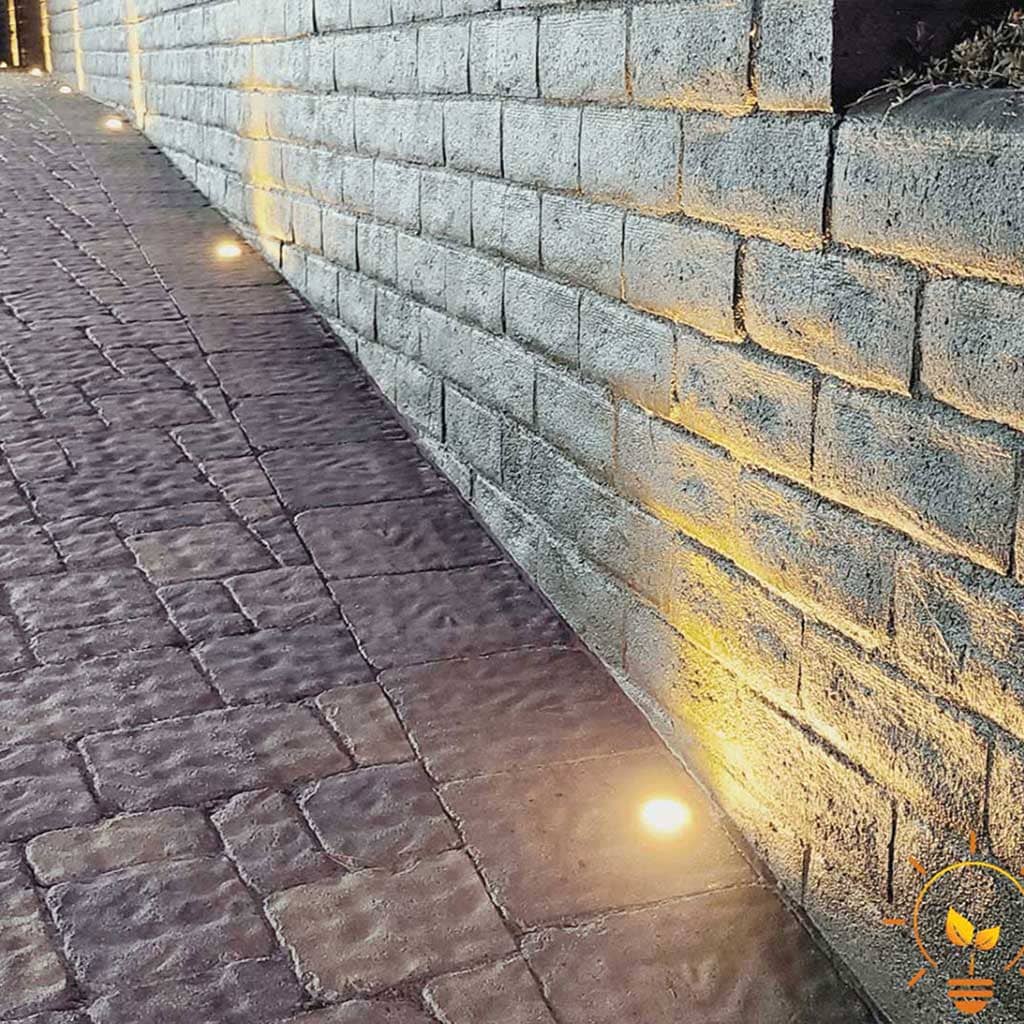
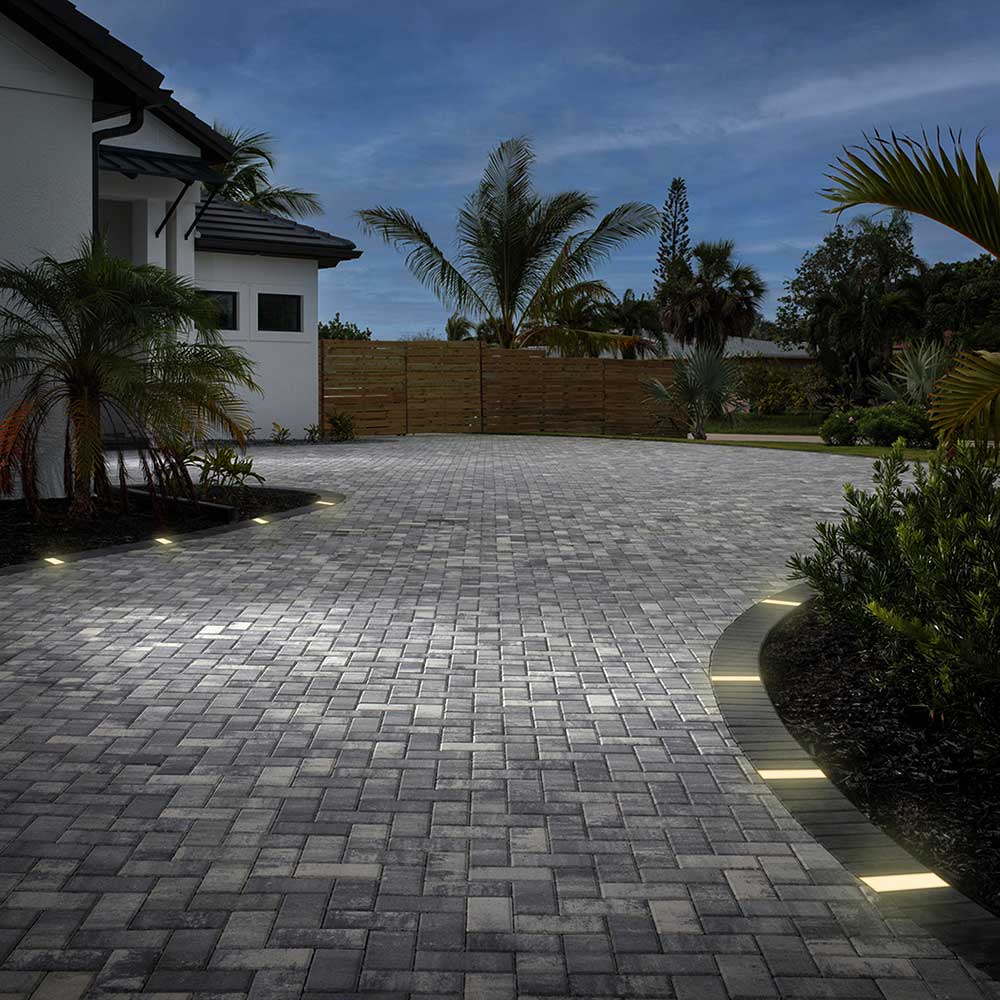
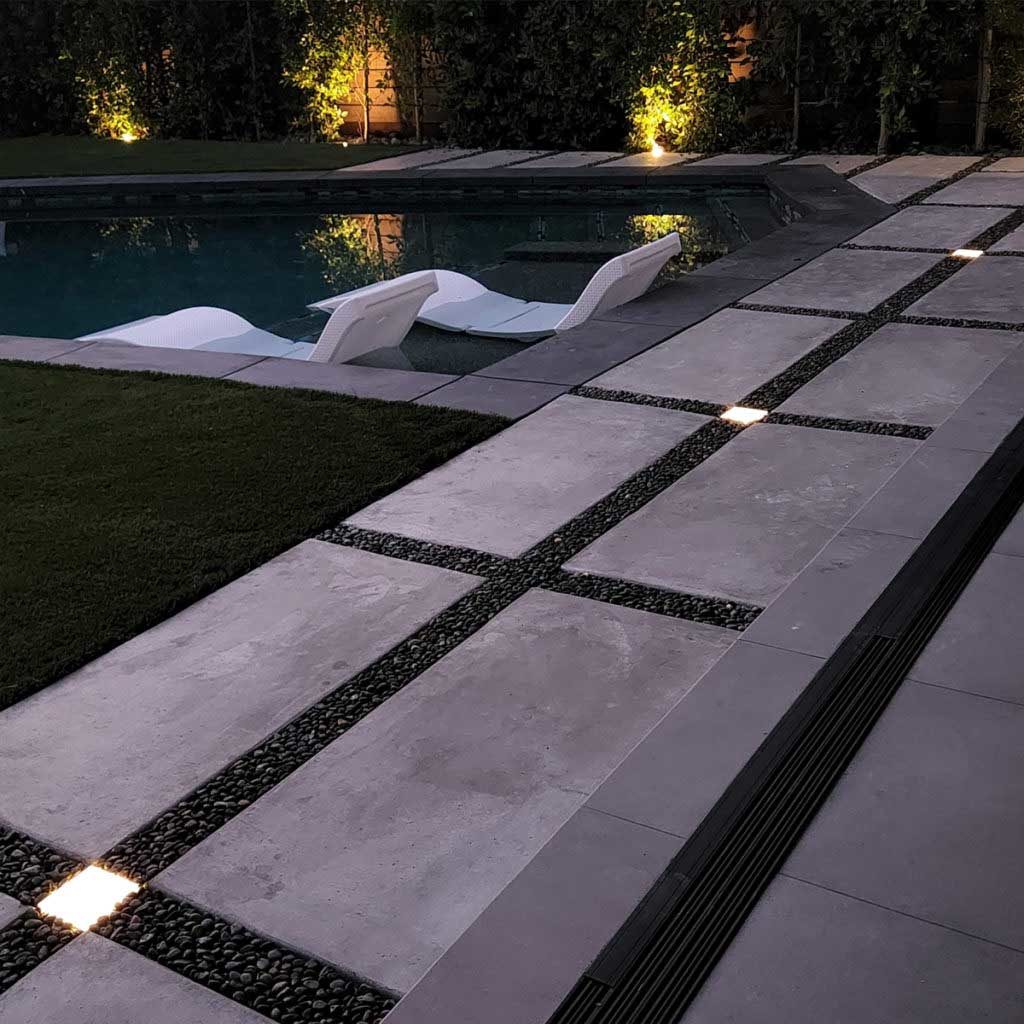
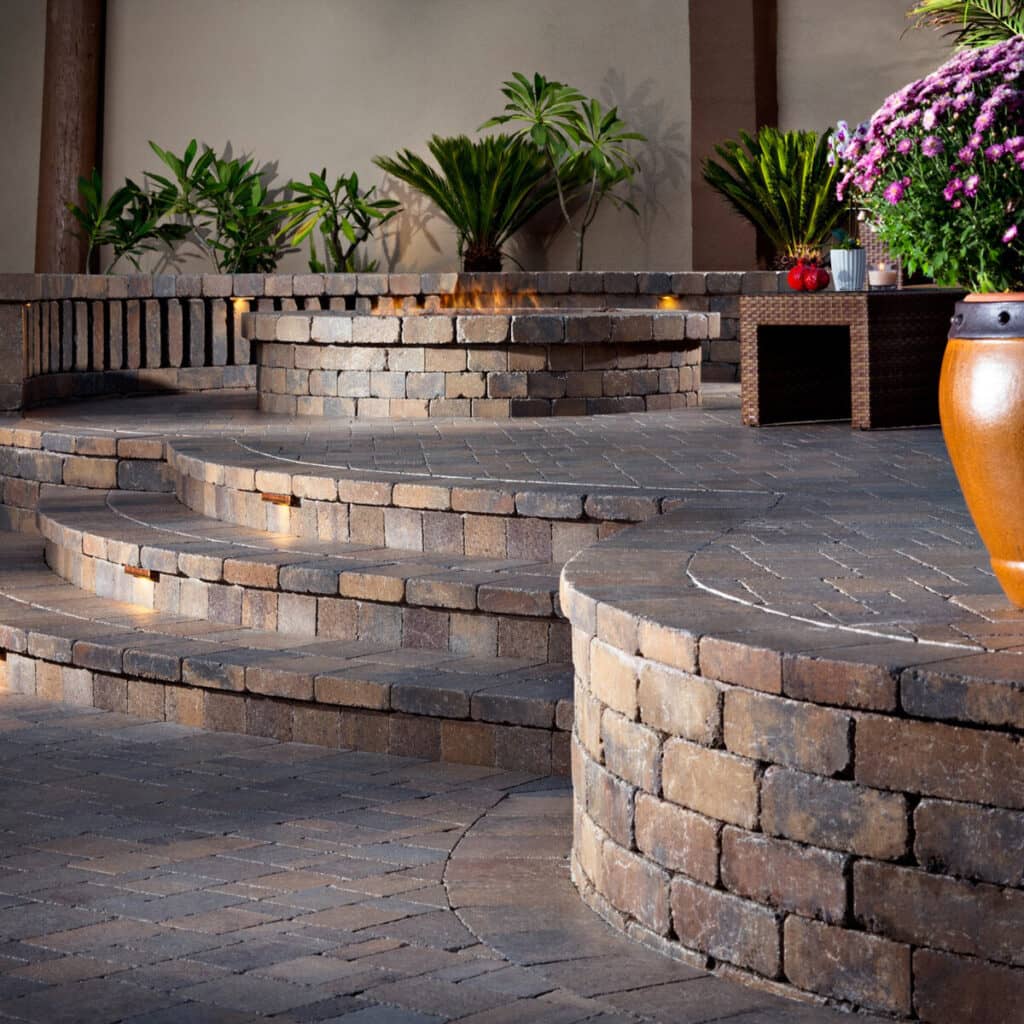
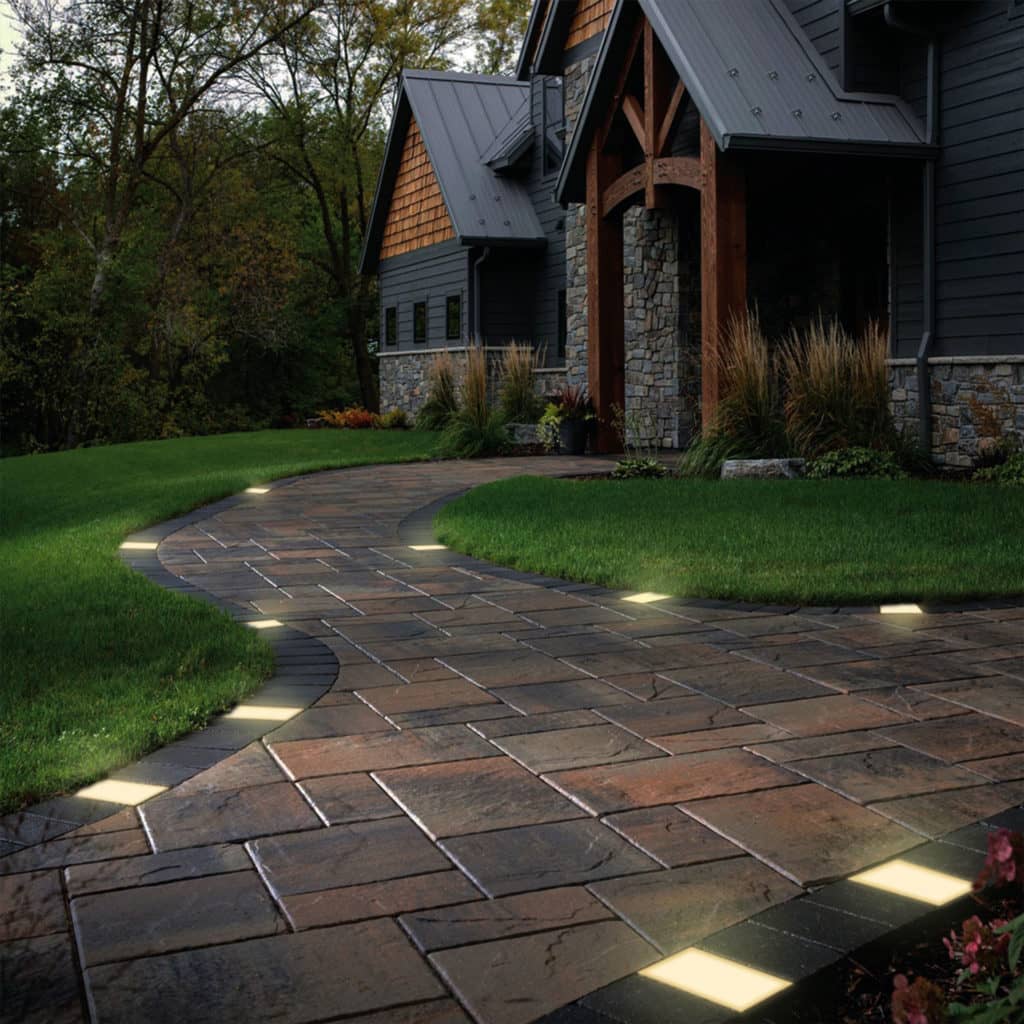
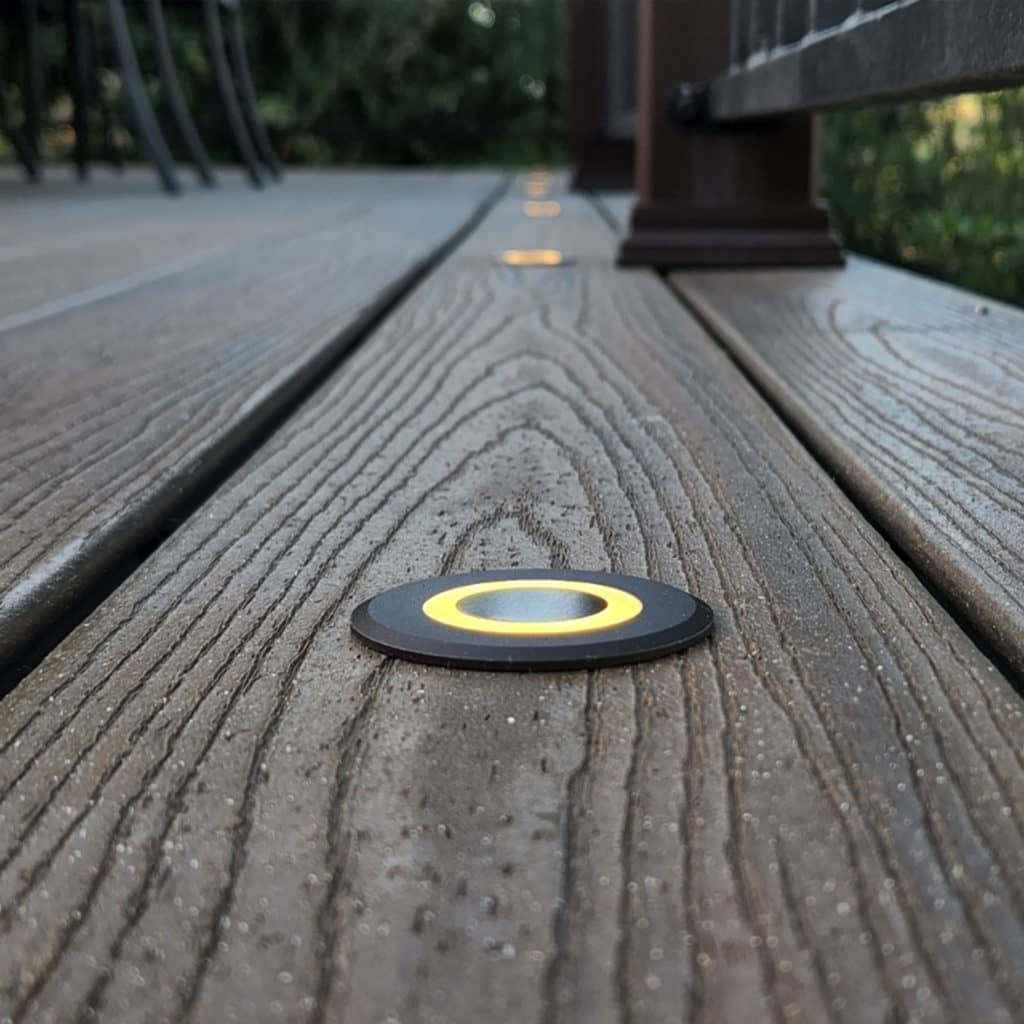
Elegant Design – (Patent Design) The Lumengy Paver LED 4×8 size (3.93 inch X 7.87 inch) is perfect for replacing 4-inch or 8-inch standard pavers, highlighting walls, along paver borders, in-between slabs, and illuminating outdoor spaces. Its stunning 5000K daylight lighting effect delivers a modern and contemporary ambiance, while the glare-free feature ensures safety and comfort.
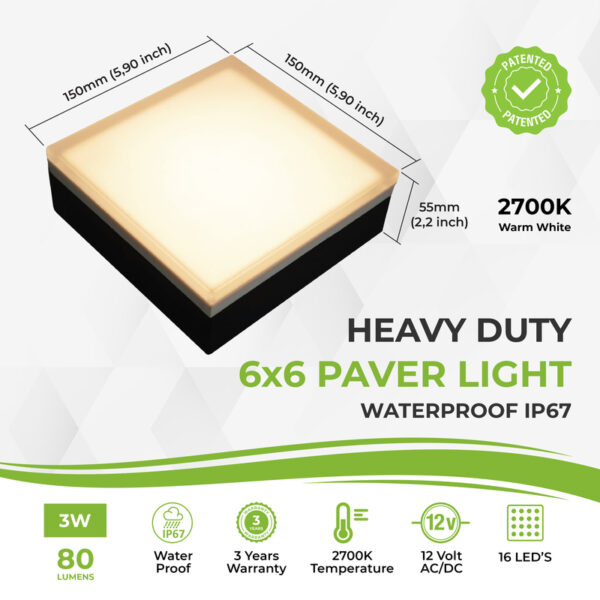
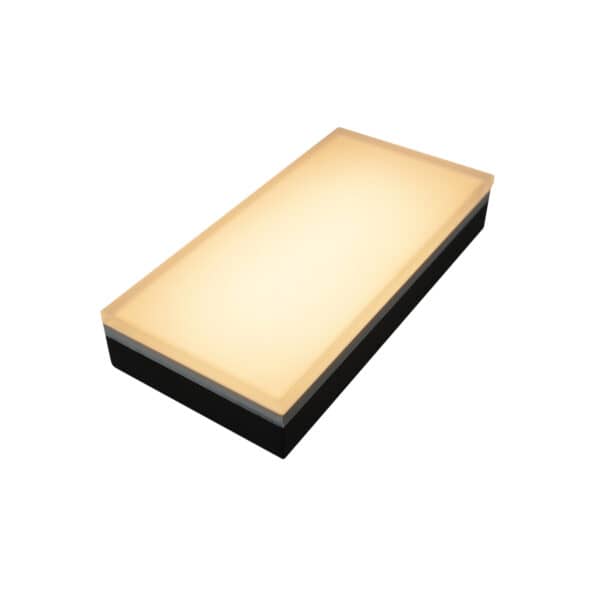
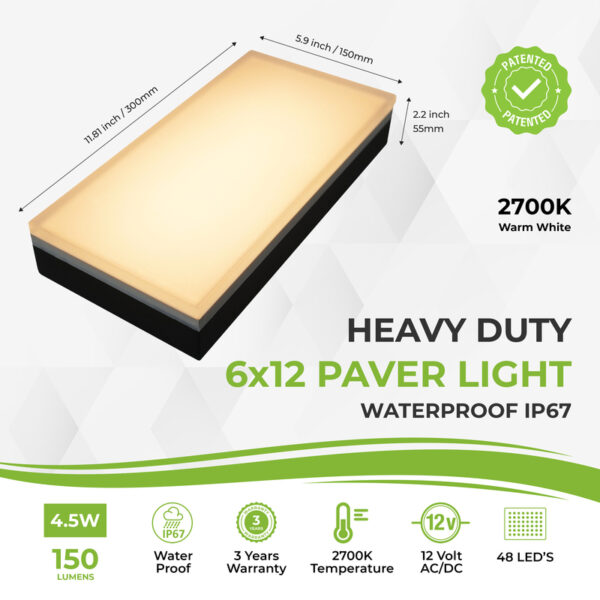
Durable Construction –The Lumengy 4×8 Paver Light features a robust stainless steel frame and thick frosted tempered glass that can withstand tough conditions, including vehicular traffic. Its 18 efficient LEDs create a unique and gorgeous daylighting effect with improved light spread, offering reliable 50,000 hours of illumination.
Waterproof and Anti-Corrosion – Lumengy’s Paver Light is IP67 rated for dustproof and water resistance, making it ideal for installation in wet areas. The durable stainless steel construction and anti-rust paint layer ensure resistance to corrosion and reliable performance in tough conditions.
Easy Installation – Lumengy 12V Paver Lights feature a 6-foot lead wire for easy connection to your main low-voltage line using waterproof wire connectors. The lights are designed for simple installation and replacement, providing a convenient solution for maintenance.
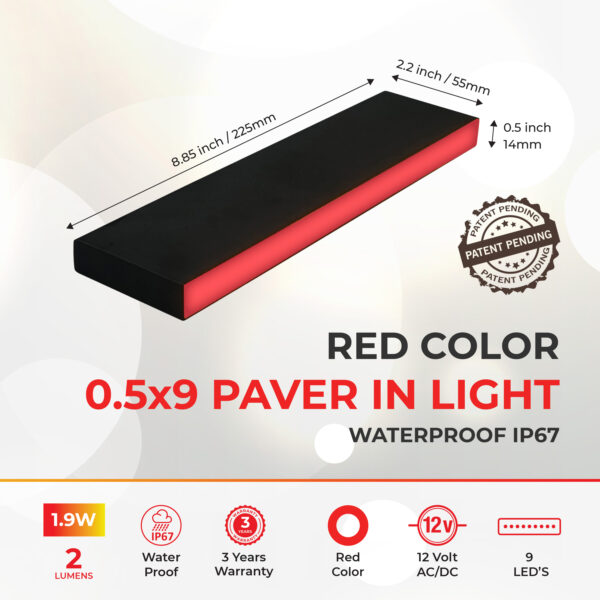
Low Voltage – The Lumengy Paver Light is safe and easy to install and maintain, powered by a low-voltage 12V landscape transformer (not included). With a power consumption of only 2 watts, it emits 65 lumens of daylight, glare-free light, providing an energy-efficient lighting solution for your outdoor area.
3-Year Warranty – Lumengy offers a 30-day return policy and a 3-year replacement service. Contact us for any replacement needs.
Package includes – One Lumengy stainless steel paver light fixture with 6-foot low-voltage lead wire.
Low Volt Transformer – This product requires a non-dimmable landscape 12v AC/DC transformer (not Included)
We purchased 10 of the 4×8 paver lights, and we’re thrilled with the product. The lights are of excellent quality, and they’ve added a wonderful ambiance to our outdoor space. The only downside was that there were no more units available in stock to buy. We would have loved to get more for our project!”
Oscar Soreno –
Rated 5 out of 5
I had doubts about this light at first. My contractor even said, “All paver lights will fail.” I bought one sample and showed it to my contractor, and he was so surprised that he bought these lights for his own house.
These lights are of very high quality. They’re made of steel, not plastic, and have thick glass. We live in Miami, and so far, they’ve been working perfectly, even through the recent floods we had here a couple of days ago.
Derek Korty –
Rated 5 out of 5
We love the lighting effect, there is nothing like this out there. I was surprise that the LED’s cant be replace, but i understand that the unit is enclose and there is 18 LED’s compare to 1 bulb in my last paver light.
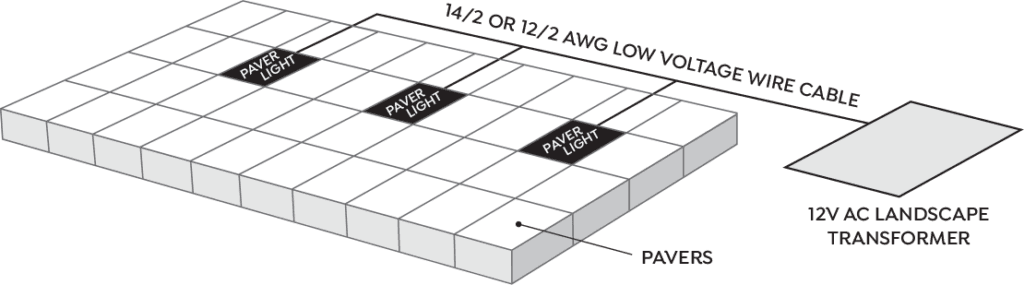
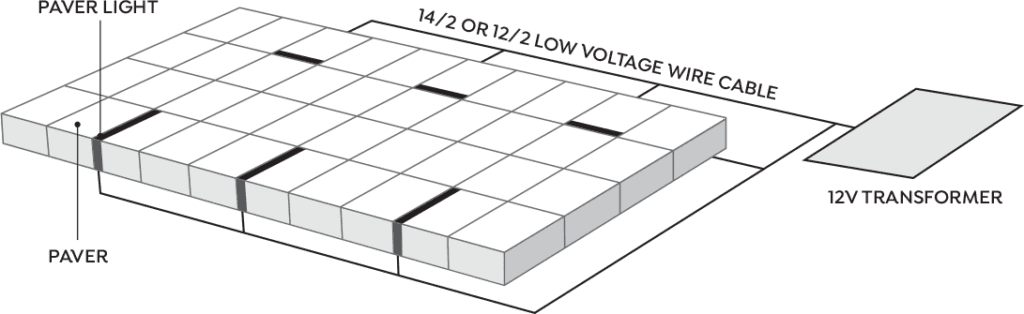
1. A 12V landscape transformer to power all your lights, with enough watts to support the total wattage of all your lights plus an additional 50% for efficiency. For example, if your lights have a total wattage of 100, purchase a 150W transformer.
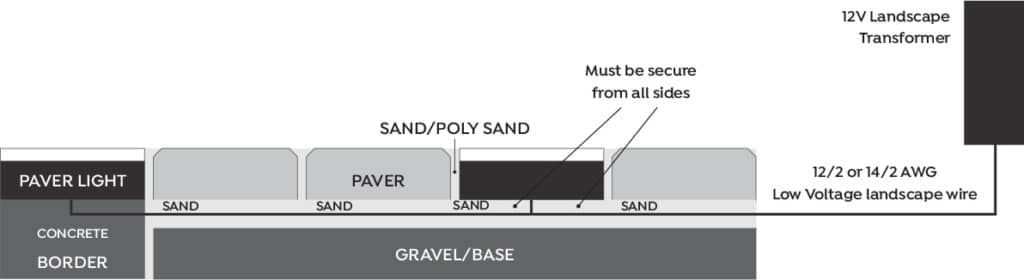
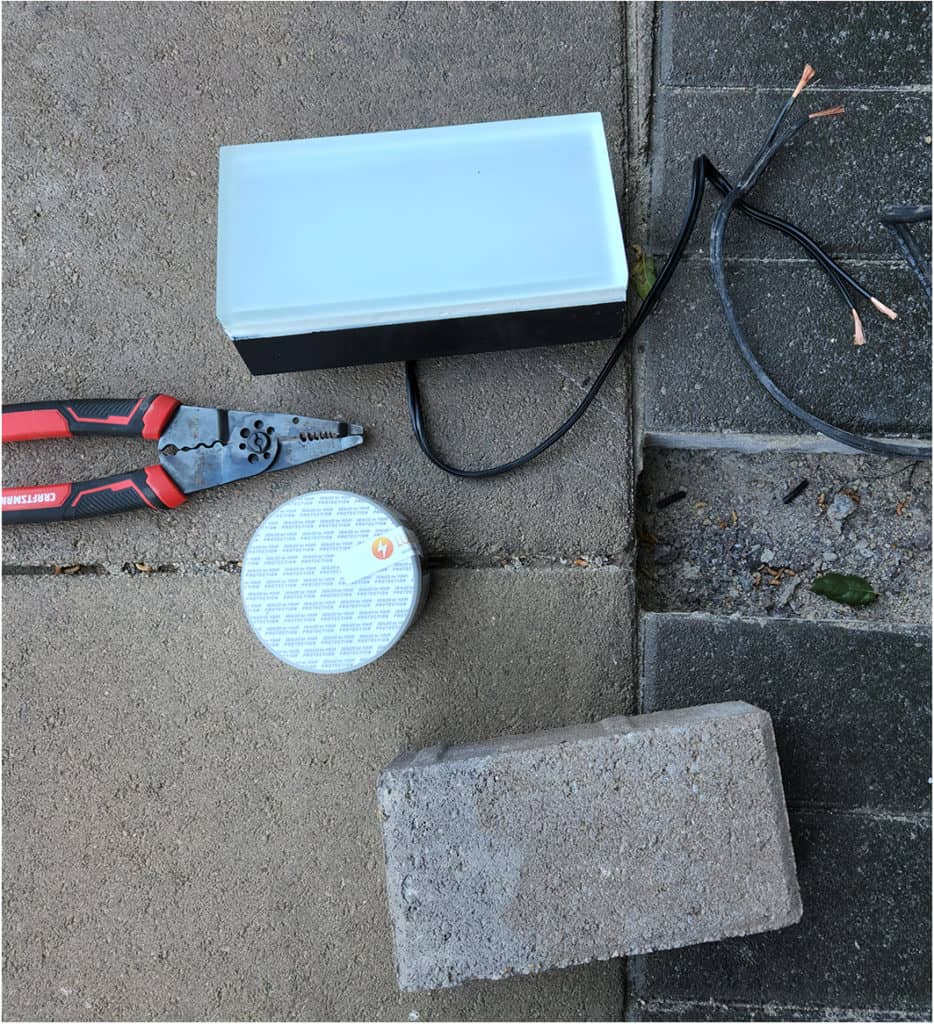
2. Main low voltage cable, which runs from the transformer to the last light in your line. Use a thick cable, such as 10/2, 12/2, or 14/2 (10/2 is the thickest). Each paver light comes with a 6-foot lead wire to connect to the main line. If the lead wire is not long enough, use 16/2 or 14/2 wire to extend it to the main line.
3. Waterproof wire connectors or electrical tape to connect the lights to the main low voltage line.
Here are some steps to follow when installing paver lights
1. Plan the light placement before you start laying new pavers, and mark the location of the lights if you have existing pavers.
2. Remove the pavers where the lights will go, and lay wires along the path of the lights. Make sure to bury the wires under walls, and add sand or gravel under the fixtures to keep them secure.
3. Install the light fixtures in the holes where the pavers were removed, or dig new holes for the fixtures and wiring.
4. Connect the main low voltage line to each light using waterproof connectors. Then, connect the line to a low voltage landscape transformer (12V AC/DC).
5. Test the lights to ensure that they are working properly.
6. Fill the holes with dirt or sand and pack it down firmly to secure the lights both below and on the sides.
7. Enjoy the beautiful and energy-efficient lighting!
Replacement:
To replace the paver light, start by turning off the power supply to the circuit from the main breaker or switch. Gently remove the old paver light with a pry bar, being careful not to damage the surrounding pavers or the electrical cable. Next, cut the wire cable and connect a new light. Ensure that you add the necessary amount of sand beneath the new light to level it with the rest of the paver.
Shipping & Delivery
SHIPPING & DELIVERY
We process and ship orders Monday through Friday from multiple warehouses across the US.
Free expedited shipping is offered, with an estimated delivery time of 2-4 days.
For large orders, please allow an additional 3-4 days for delivery.
Multiple packages may be shipped for certain orders.
If you are planning to place a large order of 50 items or more, please contact us beforehand.
You can easily track your shipment and view your purchase history in your account section.
Shipping and tracking information will be emailed to you within 24 hours.
If you have any questions, please feel free to reach out to us.
ASK A QUESTION
If you have any questions about availability, installation, large order, special requirements, or just need some advice for your project, please fill up the form below and we will get back to you very shortly.


Svetlana Nomerov –
We purchased 10 of the 4×8 paver lights, and we’re thrilled with the product. The lights are of excellent quality, and they’ve added a wonderful ambiance to our outdoor space. The only downside was that there were no more units available in stock to buy. We would have loved to get more for our project!”
Oscar Soreno –
I had doubts about this light at first. My contractor even said, “All paver lights will fail.” I bought one sample and showed it to my contractor, and he was so surprised that he bought these lights for his own house.
These lights are of very high quality. They’re made of steel, not plastic, and have thick glass. We live in Miami, and so far, they’ve been working perfectly, even through the recent floods we had here a couple of days ago.
Derek Korty –
We love the lighting effect, there is nothing like this out there.
I was surprise that the LED’s cant be replace, but i understand that the unit is enclose and there is 18 LED’s compare to 1 bulb in my last paver light.
Planning to buy more.